Are you searching for a unique chandelier but shocked by the high price tags? You want a statement piece for your dining room or entryway, but off-the-shelf options feel generic and lack personality.
You can build a stunning, custom chandelier by planning your design, gathering certified electrical parts and the right Edison bulbs, carefully assembling the wiring in parallel, and safely installing the fixture to your ceiling.

As the Marketing Manager for Omita, I don't just see our bulbs as products in a box. I see them as the final, critical element in a creative vision. Nothing is more satisfying than seeing what designers, builders, and even ambitious homeowners create with them. Many of our smaller contractor clients are asked to build custom pieces, and I've put together this guide to demystify the process. It's a project that combines a little bit of planning with basic wiring skills to create something truly special. Let's walk through it, step-by-step.
How Do You Plan and Design Your Chandelier First?
Have you ever jumped into a DIY project only to find it looks messy or unfinished? A lack of careful planning is the number one reason custom projects fail to meet expectations.
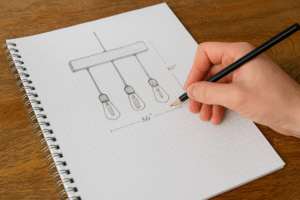
Before buying any parts, define your chandelier's style, measure your space to determine the right scale, decide on the number and type of bulbs, and sketch their hanging lengths to create a clear blueprint.

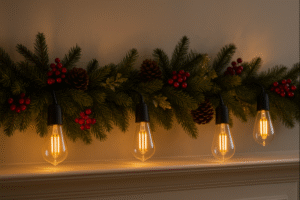
The success of your project is decided here, before you even touch a wire. This planning stage is where you act as the designer. First, define the style. Are you going for an "Industrial" look with a raw wood plank and black textile cords? Or perhaps a "Modern Rustic" feel with a piece of reclaimed live-edge wood? Maybe a clean, "Modern" look with a round, polished metal canopy? This choice will guide all your material selections. Next, consider scale and location. Measure the ceiling height and the space where it will hang. A chandelier over a dining table should be about 30-36 inches (75-90 cm) above the tabletop. For an entryway, ensure there's enough clearance for people to walk underneath. Finally, choose your bulbs and layout. This is the fun part! The number of bulbs and their shapes—like our popular ST64, the round G95, or the slender T30 tubes—will define the character. Decide if you want a neat cluster, a random stagger, or a linear arrangement. Sketch it out. This simple drawing is now your guide for the entire project.
Design Planning Checklist
| Aspect | Key Questions to Ask Yourself | Example Decision |
|---|---|---|
| Style | Industrial, Rustic, Modern, or a mix? | Rustic, using a 3-foot reclaimed wood plank1. |
| Scale | How high is the ceiling? How wide is the area? | For a dining table, 8 pendants, so it feels substantial. |
| Layout | Symmetrical, staggered, or random cluster? | A staggered layout2, with the longest cord in the center. |
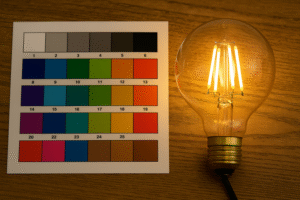
| Bulbs | What shape? What warmth (CCT)? | A mix of ST64 & A60 Omita bulbs3 at 2200K for a warm glow. |
Where Do You Get the Right Parts and Tools?
Are you feeling overwhelmed by all the different wires, sockets, and canopy options online? Buying mismatched or uncertified parts is not only frustrating, it can be a serious safety hazard.
You'll need a ceiling canopy, UL/CE certified pendant cords with sockets, your chosen LED Edison bulbs, and basic electrical tools. Always prioritize certified components for safety and peace of mind.

Gathering your materials is like preparing ingredients for a recipe. Getting it right ensures a smooth and safe process. Don't compromise on quality, especially for the electrical components. Here’s your shopping list:
Core Components:
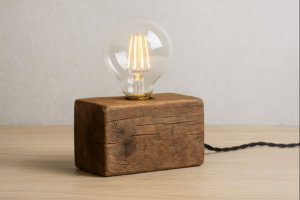
- The Base: This could be a pre-made metal ceiling canopy (round, square, or rectangular) or a piece of wood you've prepared.
- Pendant Cords: Get pre-wired pendant cords with sockets. Ensure they are UL (for North America) or CE (for Europe) certified. Choose a cord color (e.g., black textile, jute rope, clear) that matches your style.
- LED Edison Bulbs4: This is the star of the show. Based on your design, order the Omita bulbs you selected. Ensure they have the right base (usually E26/E27) for your sockets.
- Wire Connectors: Wago-style lever nuts5 are excellent for beginners as they are secure and easy to use.
- Mounting Hardware: Your canopy should come with a mounting bracket and screws.
Essential Tools:
- Drill (if using a wood base)
- Screwdriver
- Wire Strippers/Cutter
- Electrical Tape
- Ladder
- Voltage Tester6: A non-negotiable tool for safety.
As a manufacturer, we insist on the highest safety standards for our bulbs. I urge you to apply that same standard to every part you buy. Certified parts are tested to handle the electrical load and prevent hazards.
What Are the Key Steps for Safe Assembly?
Are you staring at a pile of wires and feeling intimidated? The actual wiring is the most crucial part of the build, and bringing all those cords together properly is essential for it to work.
Prepare your base, set the cord lengths according to your design, and then wire all pendants in parallel. This means all neutral (white/blue) wires connect, and all live (black/brown) wires connect.

This is the main construction phase. Work on a large, clean surface.
- Prepare the Base7: If you're using a wood plank, drill holes for each pendant cord. If using a metal canopy, it will already have strain reliefs or openings.
- Set Cord Lengths: Thread each pendant cord through its hole in the base. Adjust each cord to the pre-planned length from your sketch. Secure them from the top side using the cord's strain relief or by tying a secure knot. This ensures the weight hangs on the cord, not on the electrical connection.
- Strip the Wires8: On the top side of your base, trim any excess wire, leaving about 6-8 inches (15-20 cm) to work with. Carefully strip about a half-inch (1.5 cm) of insulation from the end of each live and neutral wire.
- Connect in Parallel9: This is the most critical step. Take one wire connector and connect ALL of the neutral wires (typically white in the US, blue in the EU) together. Take a second connector and connect ALL of the live wires (typically black in the US, brown in the EU). You now have two central connection points, one for all the neutrals and one for all the lives. If your cords have a ground wire (green/yellow), connect all of these together in a third connector. Give each wire a gentle tug to ensure it's securely locked in the connector.
How Do You Safely Install the Finished Chandelier?
Is your beautiful creation finished but you're nervous about connecting it to the ceiling? Improper installation is a serious fire and safety risk. The final step requires the most caution.
First and most importantly, turn off the power at the circuit breaker. Confirm the power is off with a voltage tester. Then, mount the bracket, connect the corresponding wires, and secure the canopy.

You're at the finish line. Do not rush this part. Safety is everything.
- KILL THE POWER: Go to your home's main electrical panel and turn off the circuit breaker for the room you're working in. Flip the light switch to confirm the power is off.
- DOUBLE-CHECK: Use your voltage tester on the wires in the ceiling electrical box to be 100% certain there is no current.
- Install the Bracket: Remove the old light fixture. Secure the new chandelier's mounting bracket to the electrical box in the ceiling.
- Make the Connections: This is easy because you've already done the hard part. Lift your chandelier and connect the wires: the large group of neutral wires connects to the neutral (white) wire from the ceiling. The group of live wires connects to the live (black) wire from the ceiling. Connect the ground to the ground (green or bare copper).
- Secure the Canopy: Neatly tuck the wires into the electrical box and push the canopy flush against the ceiling. Secure it with the provided screws.
- The Final Touch: Screw in your beautiful Omita LED Edison bulbs.
- The Reveal: Go back to the breaker, turn the power on, and flip the switch. Seeing your own custom creation light up the room is an incredible feeling.
Conclusion
Building a custom chandelier is a truly rewarding project that transforms a room. With careful planning and a focus on safety, you can create a unique, designer-quality piece.
-
Explore the advantages of reclaimed wood, including sustainability and unique aesthetics, to enhance your design choices. ↩
-
Discover how a staggered layout can add visual interest and balance to your space, making it more appealing. ↩
-
Learn about the different uses and benefits of ST64 and A60 Omita bulbs to create the perfect lighting ambiance. ↩
-
Explore this link to discover top-rated LED Edison bulbs that combine style and energy efficiency for your home lighting needs. ↩
-
Find out how Wago-style lever nuts can simplify your wiring projects with their ease of use and reliability, perfect for beginners. ↩
-
Learn about selecting the best voltage tester to ensure safety in your electrical projects, a crucial step for any DIY enthusiast. ↩
-
Learn the best techniques for preparing your base to ensure a secure and safe pendant lighting installation. ↩
-
Proper wire stripping is essential for safe electrical connections. This resource will guide you through the best practices. ↩
-
Understanding parallel connections is crucial for safe and effective electrical installations. Explore this link for detailed insights. ↩